Big Blue Dive Site Guide
Tuna Wreck
Day Trip Diving
Our Similan diving day trips will resume in November 2025
Liveaboard Diving
Location
Southeast of Similan Island #5
Skill Level
Intermediate to Advanced
Depth
28 – 35m
Currents
Mild to moderate
Topography
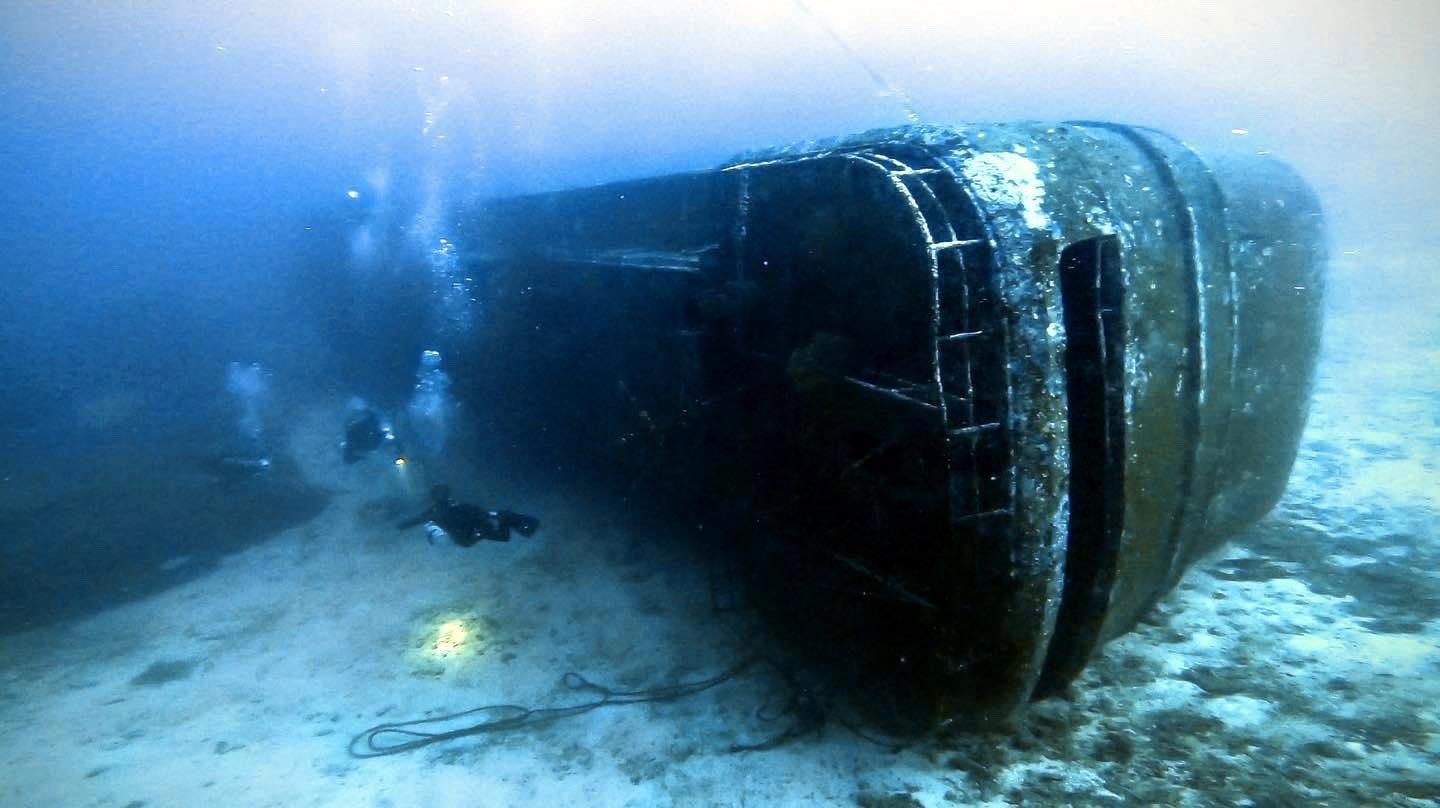
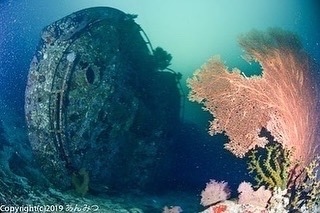
The Tuna Wreck is a sunken steel fishing vessel resting on its side on the sandy seabed in deeper water southeast of the Hideaway Bay dive site. The intact wreck lies surrounded by open sand and small coral patches, offering a stark and atmospheric contrast to the natural reef environments nearby.
Highlights
This wreck serves as a magnet for marine life. Expect to encounter schools of snapper, trevally, and batfish circling the structure, while lionfish and scorpionfish lurk around the deck areas. The wreck provides excellent shelter for moray eels and occasionally harbors the elusive ghost pipefish. Due to its significant depth, the Tuna Wreck is recommended for experienced divers with excellent air consumption and precise buoyancy control.
Tips
Monitor your bottom time carefully and stay well within no-decompression limits due to the wreck's depth and relatively isolated location. This site works excellently as a starting point before moving to Hideaway Bay's shallower sections. Bring a dive light to illuminate the wreck's darker recesses and spot hidden marine life. Plan your safety stop in Hideaway Bay's shallow, protected waters for a relaxing end to your dive.
Photography
The site offers exceptional opportunities for wide-angle photography, capturing the dramatic wreck structure against the deep blue background and surrounding schools of fish. The deeper setting creates naturally moody lighting conditions perfect for atmospheric compositions. Bring strobes or powerful dive lights to illuminate interior details and highlight macro subjects hiding within the wreck's crevices and overhangs.
Briefing
There are two approach options for reaching the Tuna Wreck. For divers who haven’t been underwater recently, we typically enter at the shallow southeast corner of Similan Island Five, then descend gradually along the reef to the wreck site. Alternatively, we can use the dedicated mooring line positioned further from the island for direct descent to the wreck. The wreck sits approximately 10 meters from the main reef, making it easily accessible and allowing seamless continuation along the reef after wreck exploration.
Given the wreck’s depth, we limit our time here to preserve air and bottom time for exploring the spectacular reefs along the southern sections of Islands Five and Six during our full hour-long dives. Our typical route involves swimming above the ship’s hull toward the stern, then descending slightly to return along the ship’s rails and deck area toward the bow. We maintain an external exploration approach—wreck penetration requires specialised certification and training, and the interior offers little beyond empty storage compartments.
The surrounding boulder formations host impressive gorgonian sea fans and attract schooling fish, providing additional photographic opportunities. After our wreck exploration, we will ascend along the reef.
For more information about the broader dive area, read about Hideaway Bay dive site.
History & Background
The origins of the Tuna Wreck trace back to a Taiwanese fishing vessel that was allegedly caught conducting illegal fishing operations in Thai waters near the Similan Islands National Park. According to local accounts, the boat was impounded by Thai authorities and initially moored at Tap Lamu harbor. Rather than let the vessel deteriorate, officials made the decision to deliberately sink it at Hideaway Bay to create an artificial reef and fill a large sandy gap within the existing reef structure.
However, the controlled sinking didn’t proceed as planned. Instead of settling on the reef slope at the intended depth of 12-22 meters, the vessel continued its descent, ultimately coming to rest on its side at 40 meters depth—making it a challenging but rewarding dive for advanced divers.